
The Sweep tool creates a 3D solid by sweeping a section profile along a path. The resulting body can have a constant or variable cross-section.
Steps:
Select the profile type: "Sketch Profile" or "Circular Profile".
Select the sweep profile.
Select the sweep path.
Select the boolean type: "Add" or "Subtract".
(Optional) Enable "Follow Path" to keep the profile aligned with the tangent direction of the path during the sweep.
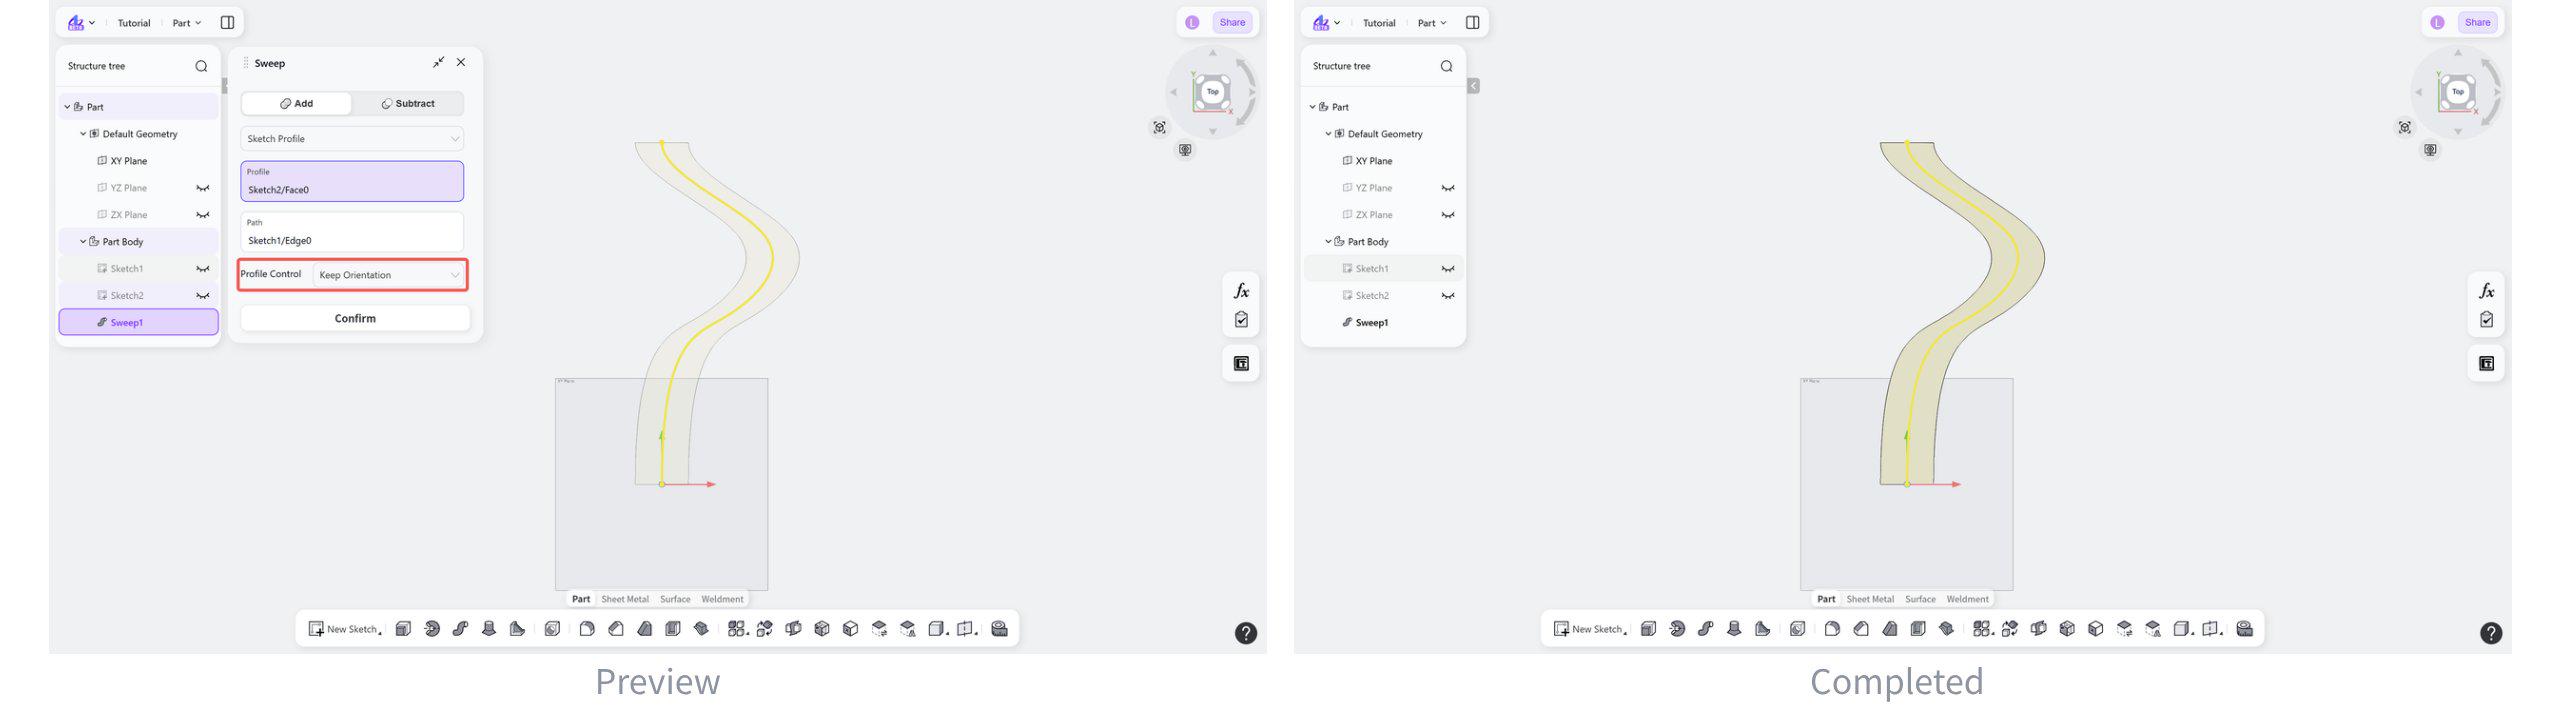
(Optional) Enable "Keep Orientation" to keep the initial normal direction of the profile unchanged during the sweep.
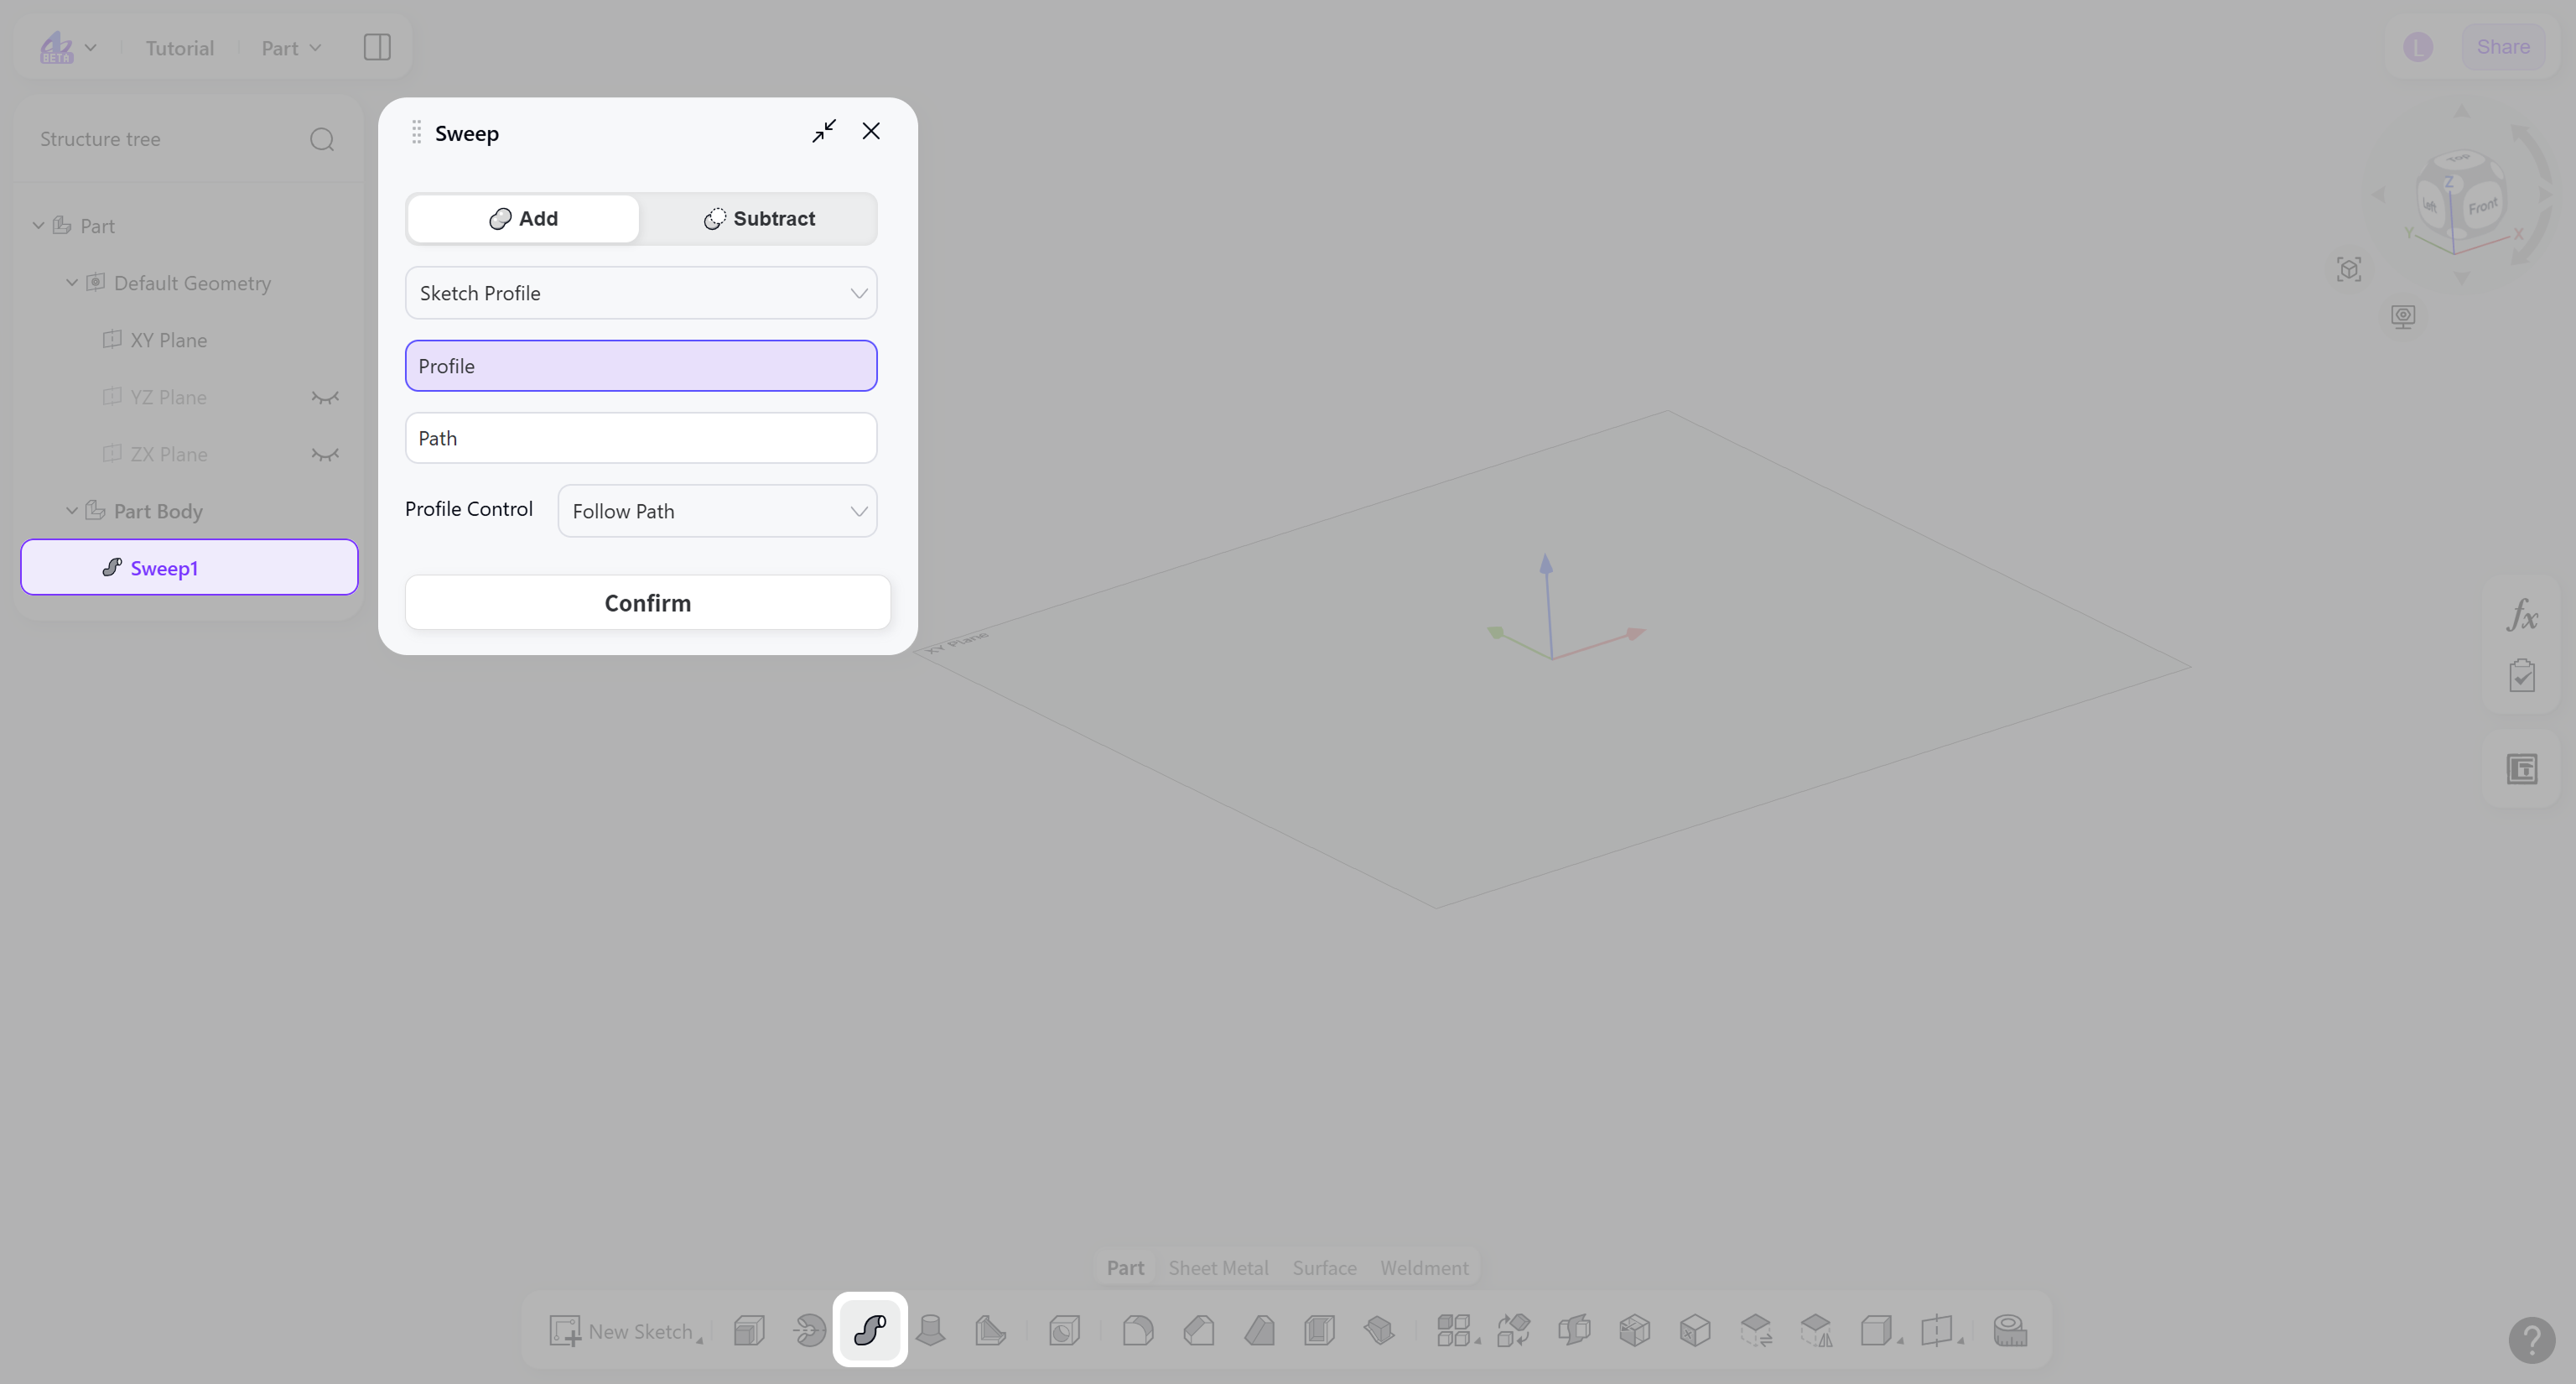
Profile Type
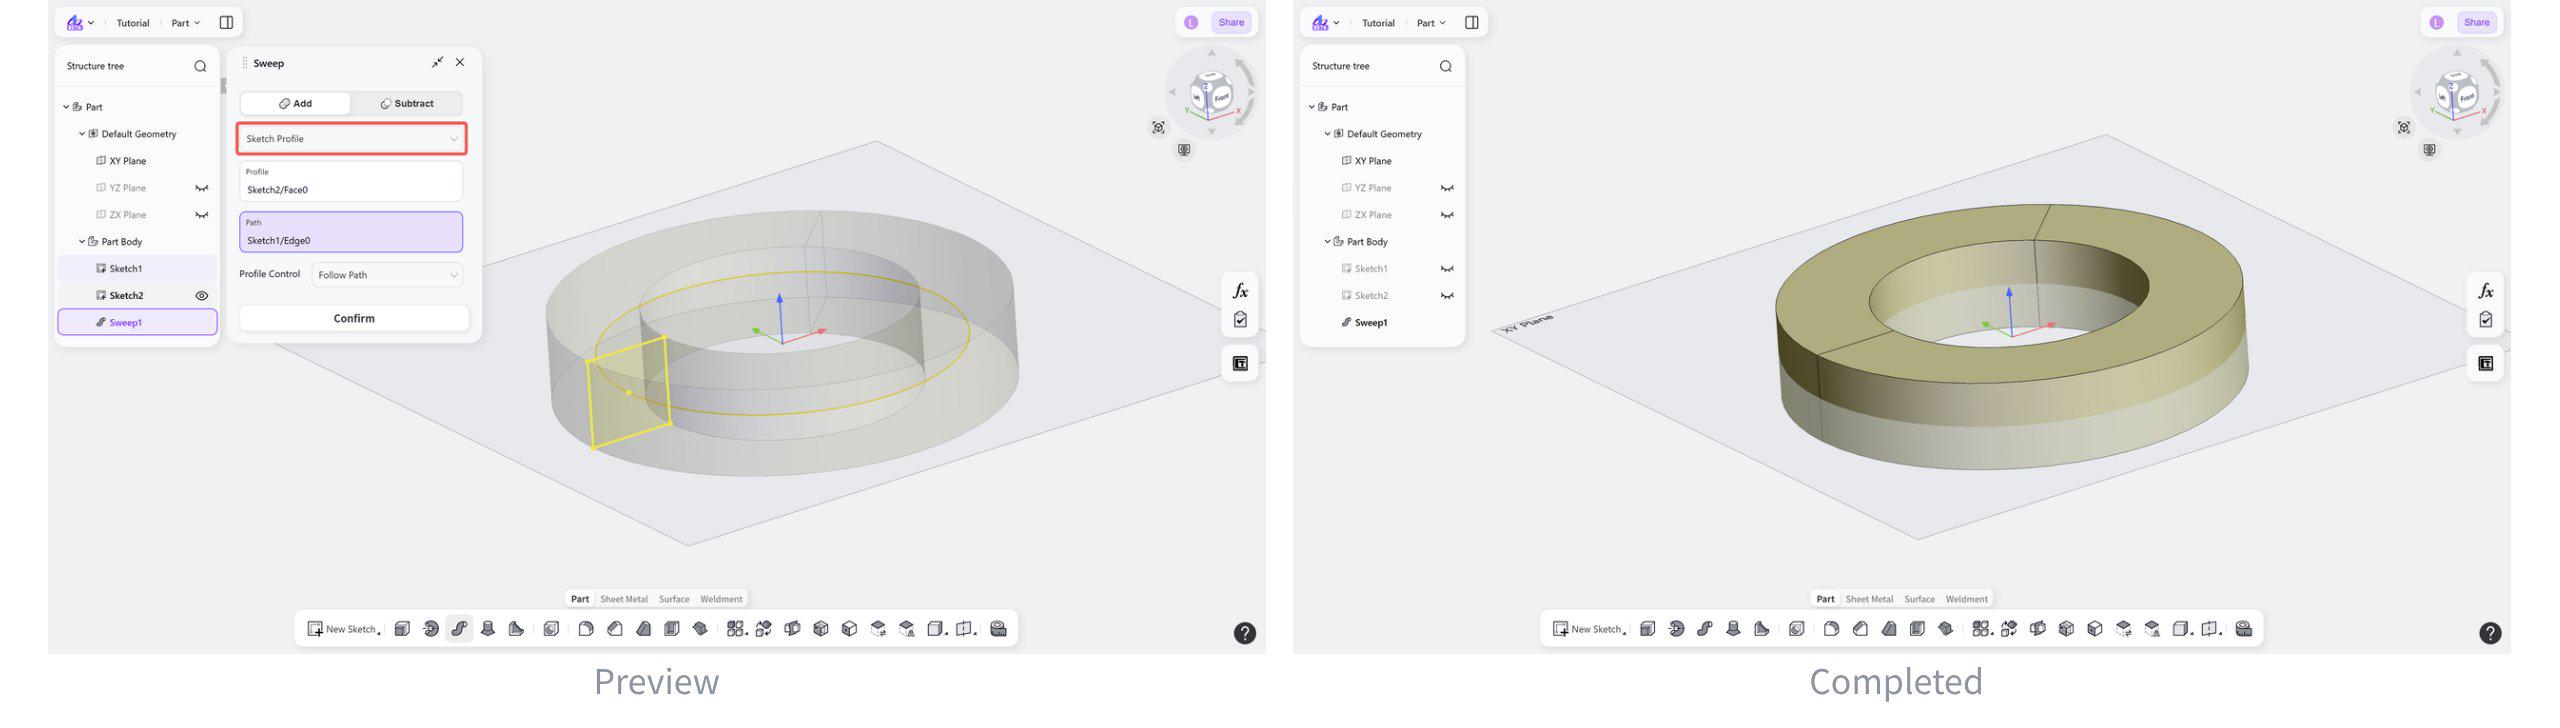
Profile Type: Sketch Profile
Generates the swept body by using a selected sketch as the sweep profile.
Steps:
Select "Sketch Profile".
Select the sweep profile and sweep path.
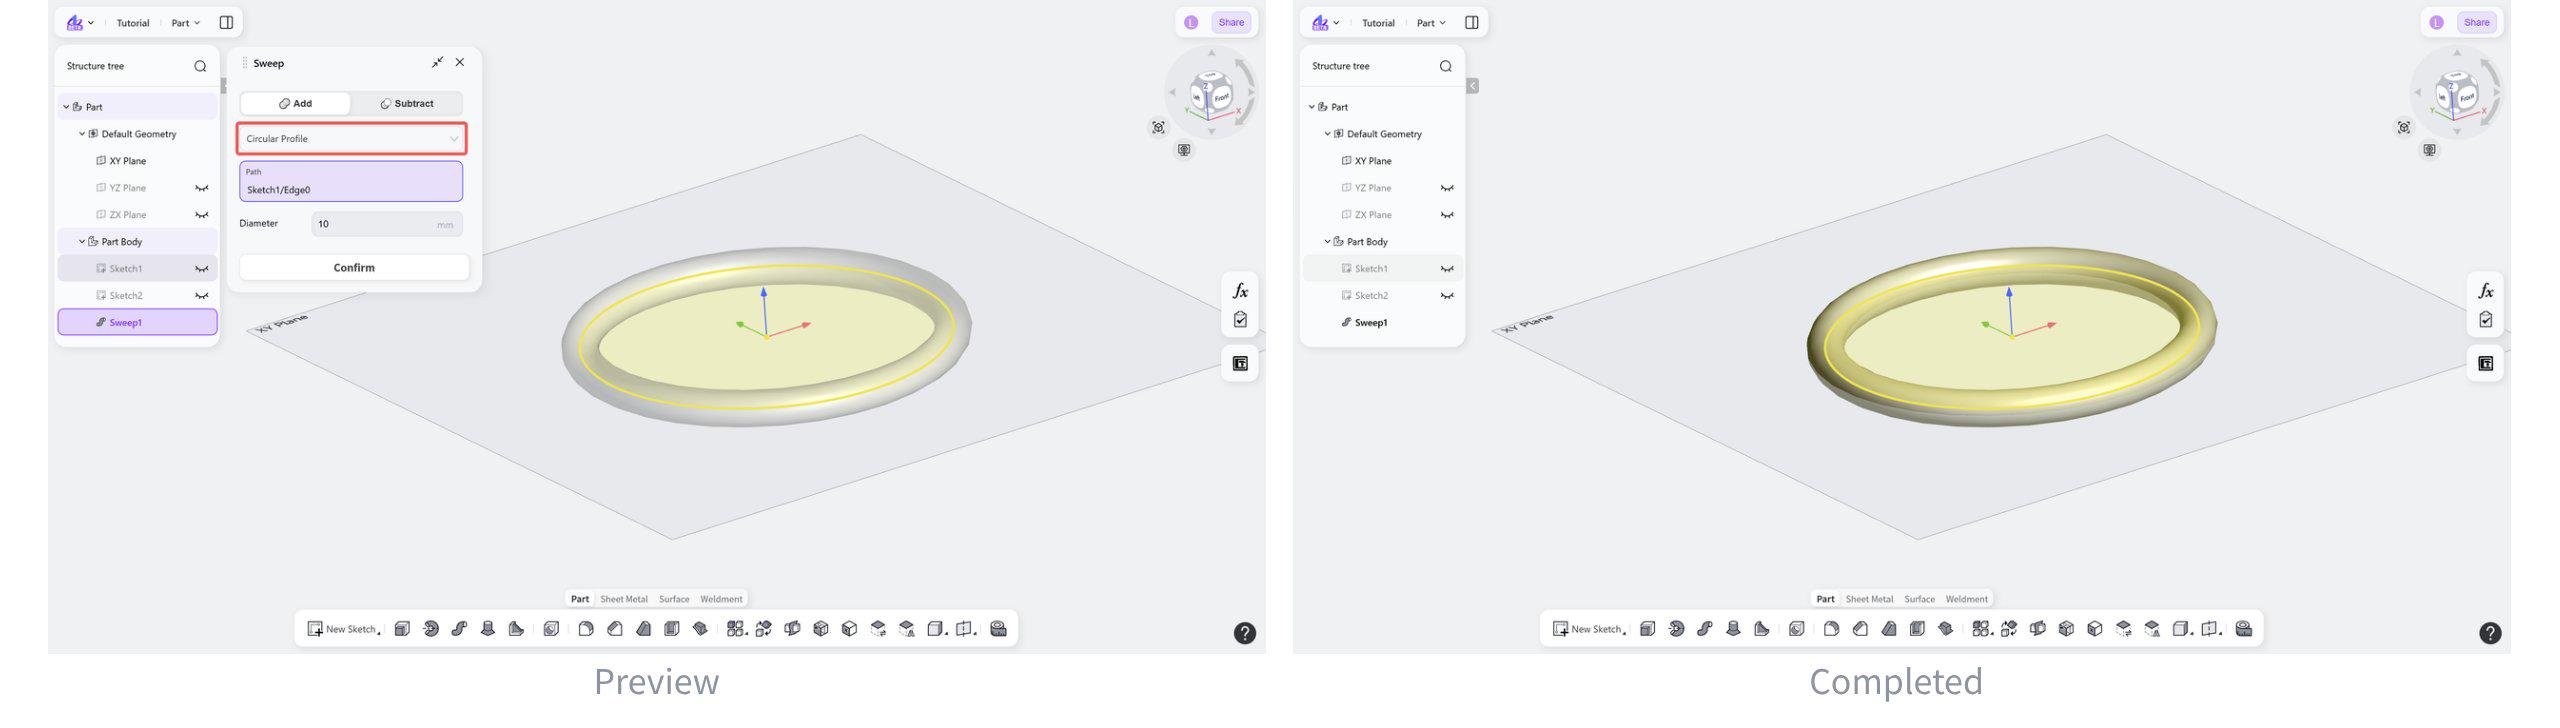
Profile Type: Circular Profile
Generates the swept body by using a circular cross-section as the sweep profile.
Steps:
Select "Circular Profile".
Select the sweep path and set the radius.
Boolean Type
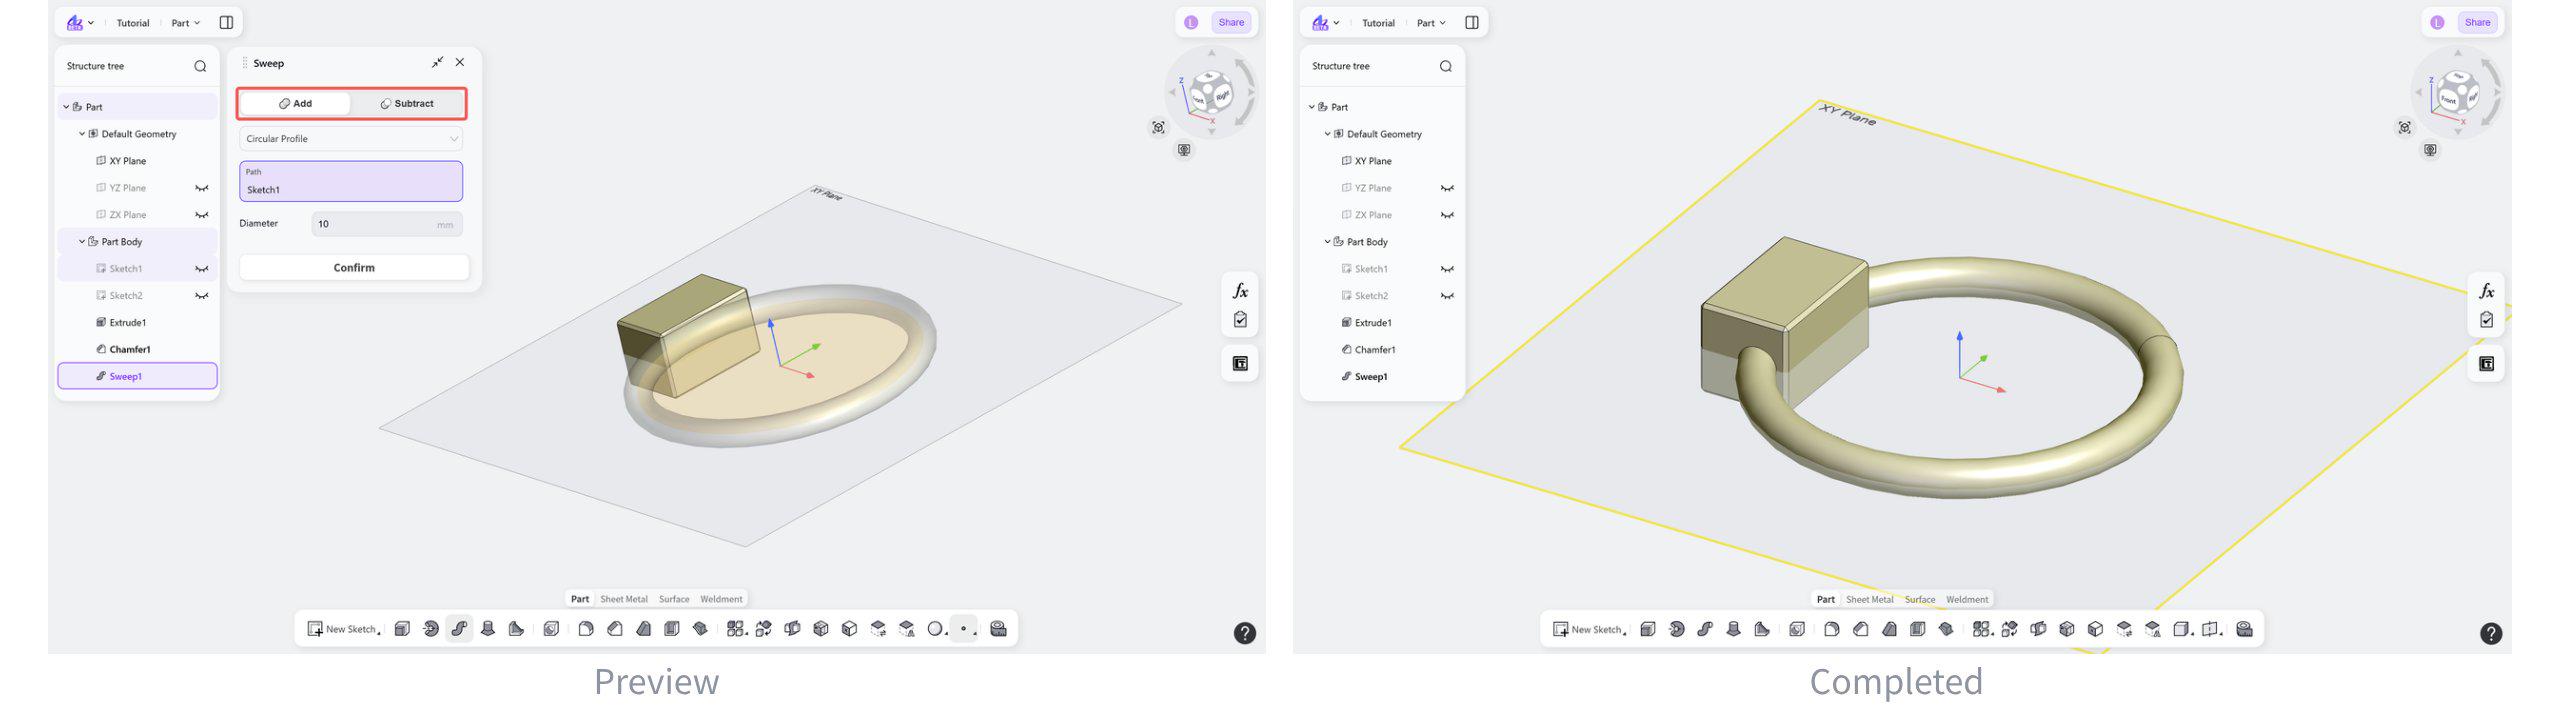
Boolean Type: Addtion
Merges the newly created sweep geometry with the existing solid into a single body.
Select "Add".
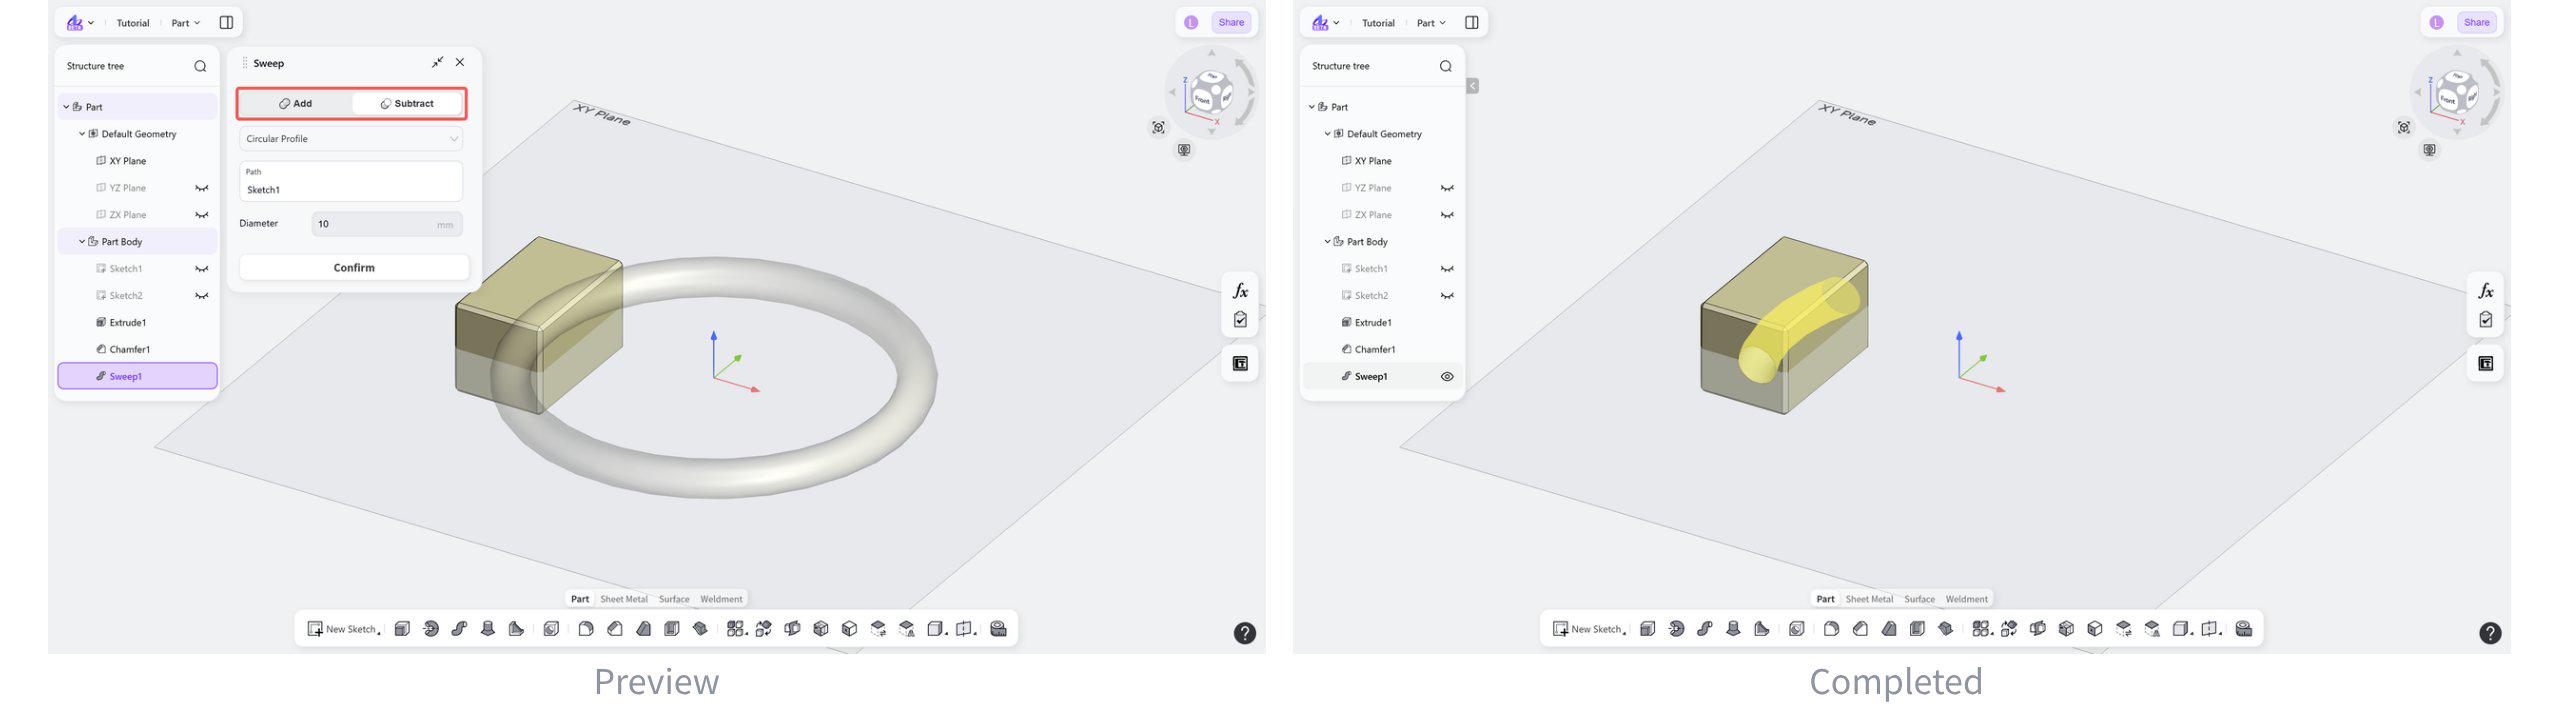
Boolean Type: Substraction
Subtracts the newly created sweep geometry from the existing solid and removes the overlapping material from the original body.
Select "Substract".
Profile Control
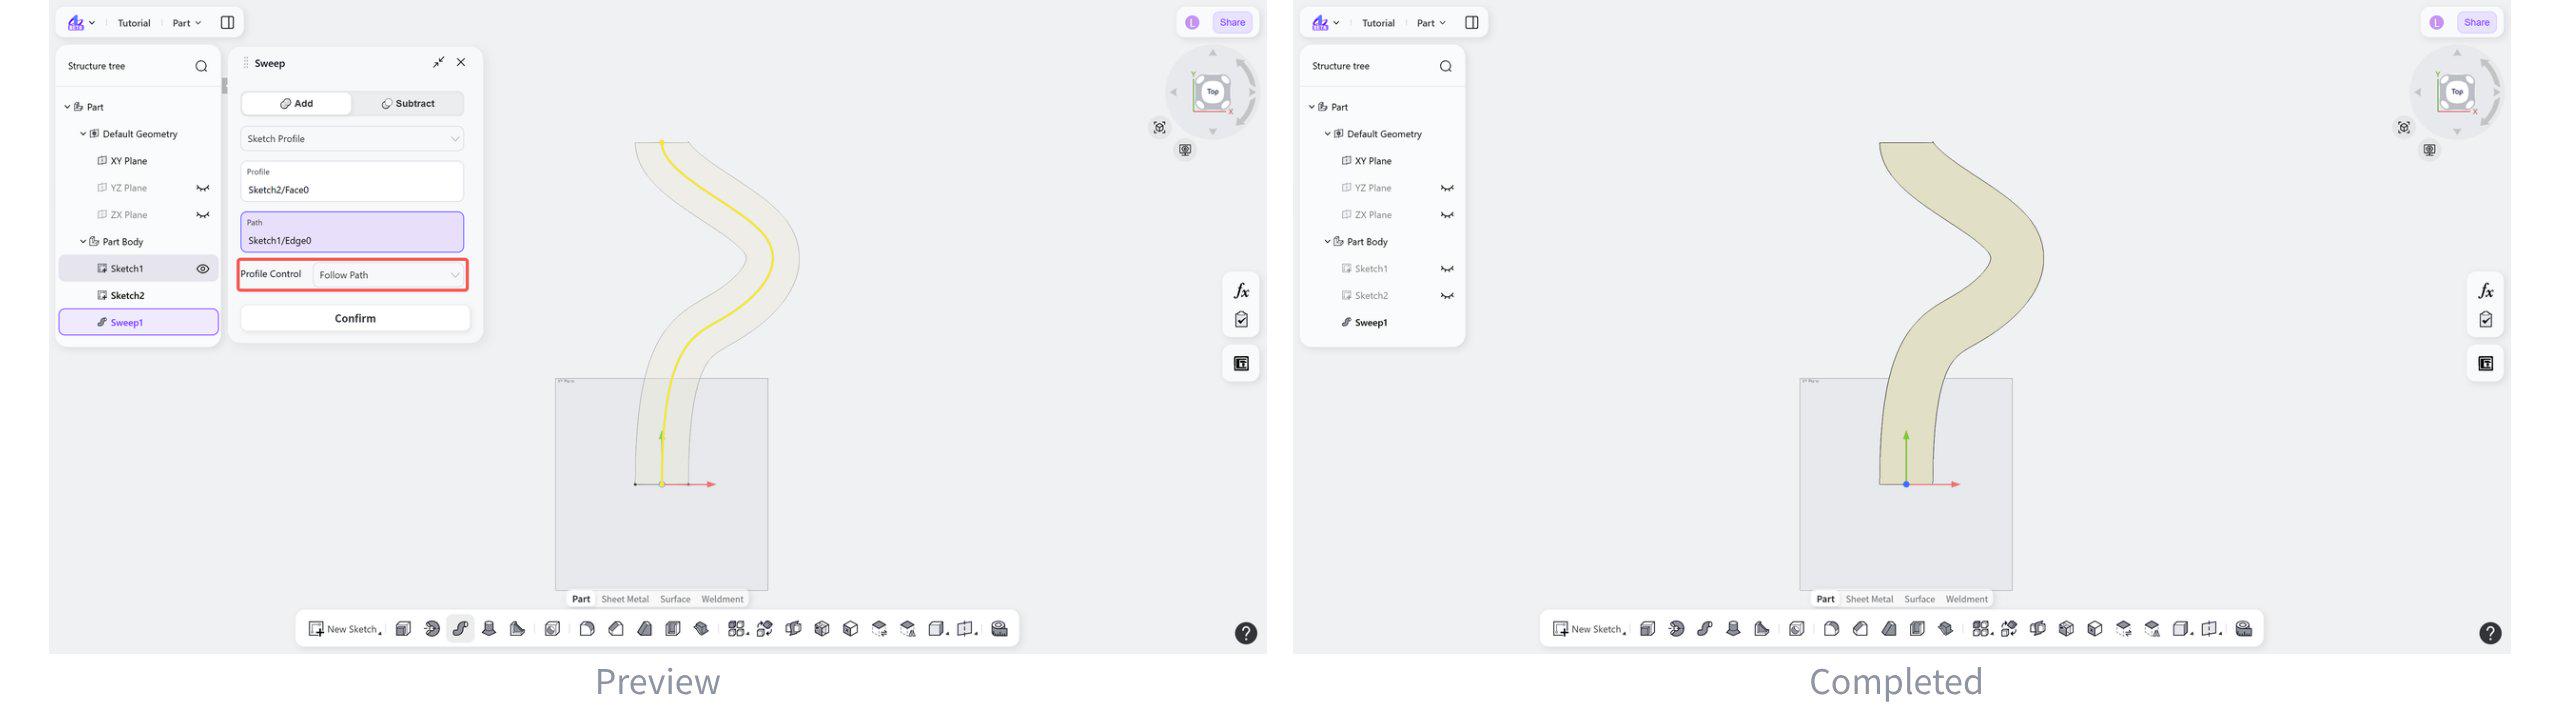
Profile Control: Follow Path
Keeps the profile aligned with the tangent direction of the path during the sweep.
Select "Follow Path".
Profile Control: Keep Orientation
Keep the initial normal direction of the profile unchanged during the sweep.
Select "Keep Orientation".